Water Heater Repair, Part 1
Sep
7
2010
You may recall from an old blog post that I had some water heater trouble. I paid a plumber $90 to press the reset button on the water heater.
At least it fixed the water heater.
For a few days.
Then the water got cold again. But I knew what to do – go press the reset button.
Ahh, hot water again.
Then the water got cold again. Reset button… still cold water.
Hmm… circuit breaker?
Ahh, hot water again.
After a few days of pressing the reset button and resetting the circuit breaker EVERY SINGLE DAY, I decided something must be wrong. The water heater should not trip the circuit breaker (or blow the fuse). But I already spent $90 on this problem and I was not going to make it $180.
I looked up instructions on the internet for how to fix an electric water heater. They looked simple enough. And they worked!
All I spent was about $30, and now I will share the wealth of knowledge with you.
Before I fixed the water heater, I was intimidated by water heaters. All I had heard before was horror stories about how so-and-so’s water heater exploded and blew the room to smithereens. So I had avoided them and feared them.
But they’re not that bad – nothing to fear. It is just a big bucket of water with two resistors and two switches. (for non-engineers, replace resistors with heaters)
Note: These steps are for electric water heaters. I still fear gas-fired water heaters.
All I had to do to fix it was find which resistor or switch was bad and replace it.
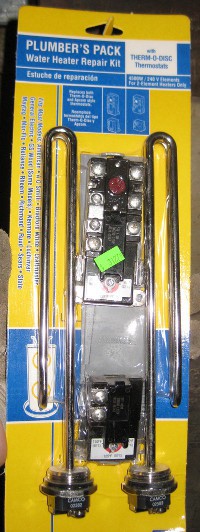
The resistor is a heating element and the switch is a thermostat. I looked up the model # and stuff for the heater and found it had two heating elements of 4500 watts each. Lo and behold, the local big-box store had a set of two elements and two thermostats, and it was only slightly more expensive than a single heating element.
I bought the set because then, no matter what was wrong, I would have what I needed.
The symptom I was experiencing was that the water would be hot but not for very long. All the how-to sites said that meant the upper element was bad. If the lower element had been bad, I should have had not-so-hot water but more of it.
The amount of heat remains the same:
upper element = concentrated,
lower element = diluted.
If you’re a non-engineer and still reading this – don’t worry, it gets easier.
Now on to the steps. If you want pictures, come back for the next installment of writing about this water heater project.
Step 1: Find the bad element. WAIT! Turn off power to the heater. Then find the bad element. This is the trickiest step, so come back for more details in Part 2.
Step 2: Drain the water out of the tank. Believe me, it is a lot harder if you skip this step. Note that the water supply should be turned off before you start this step.
Step 3: Replace the bad element.
Step 4: Fill the tank back up and turn power back on.
Step 5: Run the water for a while because you will have stirred up sediment and your water may be gray or cloudy for several minutes.
And that’s all there is! How to fix your water heater in five easy steps!
It took me about 15 minutes for step 1, 3 hours for step 2, 1 hour for step 3, and 45 minutes for steps 4 and 5. That’s a total of 5 hours, not including time at the store buying parts.
Step 2 took a long time because I had to do it twice. Learn from my experience – if only the upper element is bad then you don’t need to drain the tank all the way. Do it in half the time by draining only half the tank.
Step 3 took a long time because the element was very stubborn. So stubborn, in fact, that it gets its own blog post (Part 3).
To be continued . . .
I know your deeds, that you are neither cold nor hot; I wish that you were cold or hot.
Revelation 3:15


This little article thingy was written by Some Guy sometime around 6:49 am and has been carefully placed in the Projects category.

 This is Alpha, the first-born, when he was 2YO.
 This is Beta, the second-born, when he was about 2YO.
 This is Gamma, the third-born, when he was about 18MO.


September 9th, 2010 at 6:41 am
[…] post is where I expand on step 1 from my earlier post on how to fix a water […]
September 14th, 2010 at 6:39 pm
[…] post is where I expand on step 3 from my earlier post on how to fix a water […]